Installing the Breed Bootloader on the HiWiFi 3
The following is a consolidated version based on the original post, with more detail and instructions better suited to beginners.
Note: This guide is for the HiWiFi 3. Going online will void the warranty, even if you didn't use an exploit to enable SSH!
Let's begin:
1. Obtain root access on the HiWiFi router Install the developer plugin to obtain root access. First, log in to your HiWiFi router's admin interface. Enable developer mode: “Cloud Plugins” > “Router Information” > “Advanced Settings” > “Enable”. Install the developer plugin: “Cloud Plugins” > “All Plugins” > “Developer Mode” > “OK”. (Rooting voids the official warranty, so think carefully.) 1. Download H's recovery-capable uboot (breed) for HiWiFi 3, breed-mt7620-hiwifi-hc5861.bin, from http://www.right.com.cn/forum/thread-161906-1-1.html. 2. Use WinSCP click here to download winscp to log in to your HiWiFi router. Username: root. Password: your admin-interface password. Port: 1022 / 22. Mode: SCP. 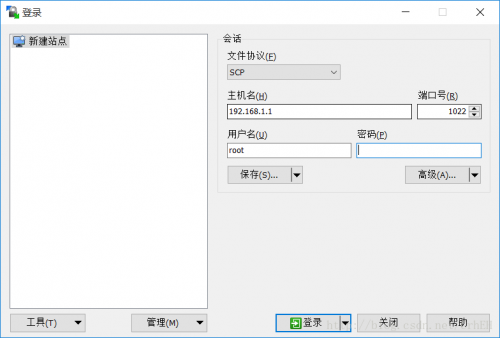 After logging in, open the /tmp directory and upload the breed-mt7620-hiwifi-hc5861.bin file you just downloaded. (Note: when I logged in, I initially landed in an empty directory. Going up one directory made /tmp appear.) 3. Use PuTTY click here to download to log in to your HiWiFi router, using the same username, password, and port as above. After logging in, enter this command: mtd -r write /tmp/breed-mt7620-hiwifi-hc5861.bin u-boot
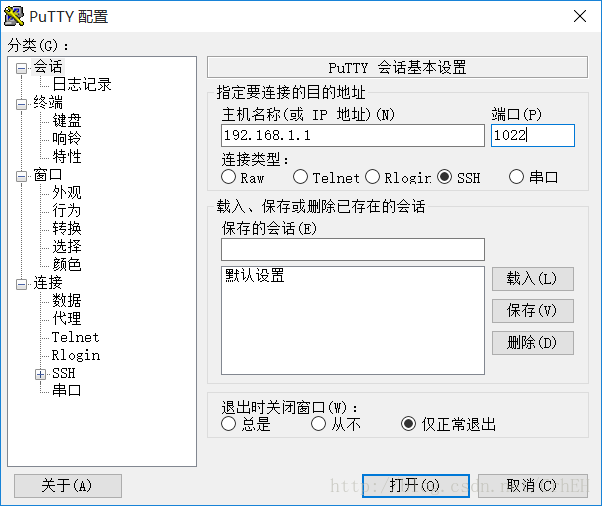 4. When “rebooting” appears, wait for the router to finish restarting. The recovery-capable uboot is now flashed. (I couldn't tell whether it had restarted anyway... I just waited 5 or 6 minutes.) 5. How to use the recovery-capable uboot (breed): 1. Connect your PC to a router LAN port with an Ethernet cable. 2. Set the PC to obtain an IP address automatically. 3. Power off the router (unplug it). 4. Hold reset and plug the router's power back in. ps: Don't let go of reset; press reset first, then plug it in. 5. Keep holding reset for about 5 seconds, and release it when the router's lights flash. 6. The PC's network adapter obtains a 192.168.1.x address (set it manually if it doesn't), usually 192.168.1.1. 7. Open 192.168.1.1 in your browser, and you'll see the uboot console. 8. Firmware backup: back up, back up, back up — important things deserve saying three times!! You can back up the current firmware in case you need it later. I strongly recommend that HiWiFi users make a backup the very first time they open the interface after flashing Breed. That way, if you later want to return to the official firmware, the original features won't be affected, and you'll still be able to access the cloud platform. If anything is still unclear, leave a comment and I'll reply when I see it. PS: If you brick it, I'm not responsible. It worked for me, anyway.
Published 05/28/2018 · Krunk Zhou
Join the conversation